MENU
How To Use Zoom for Examinations
Zoom makes it super easy for anyone to set up and conduct virtual meetings — but if you’ve never used the tool before, this can still be tricky.
At ATOD we’ve used Zoom for a number of our Examination days due to restrictions as a result of the COVID pandemic closures and travel restrictions. We found that Zoom works as a tool for conducting these days very adequately but recommend when you first start out that you keep the process as simple as possible.
To help you out, here’s a step-by-step guide to using Zoom Meetings the right way. We’ll cover the steps for both desktop and mobile platforms on:
- How To Get Started With Zoom
- How To Set Up A Zoom Meeting
- How To Join A Zoom Meeting
- How To Schedule Meetings
- How To Record Meetings
1. How To Get Started With Zoom
For Desktop:
Step 1: To get started with Zoom, head to their website, and click on the “SIGN UP” button that’s at the top-right corner of the screen.
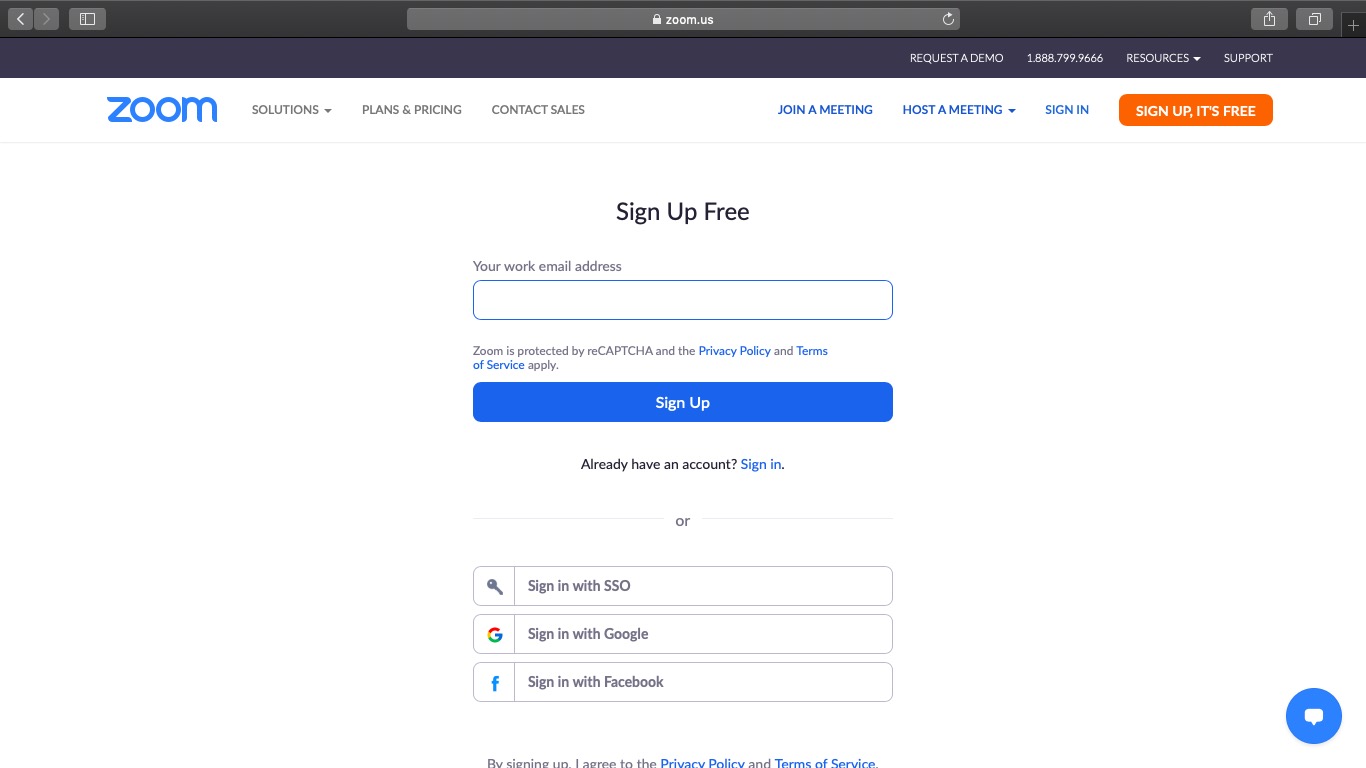
Step 2: You have two options when it comes to creating a Zoom account.
You can either:
- Create a new account using your studio email address.
- Sign in using SSO (Single Sign-On) or your Google or Facebook account.
If you’re using Zoom for studio purposes, it’s best to sign up using that email address.
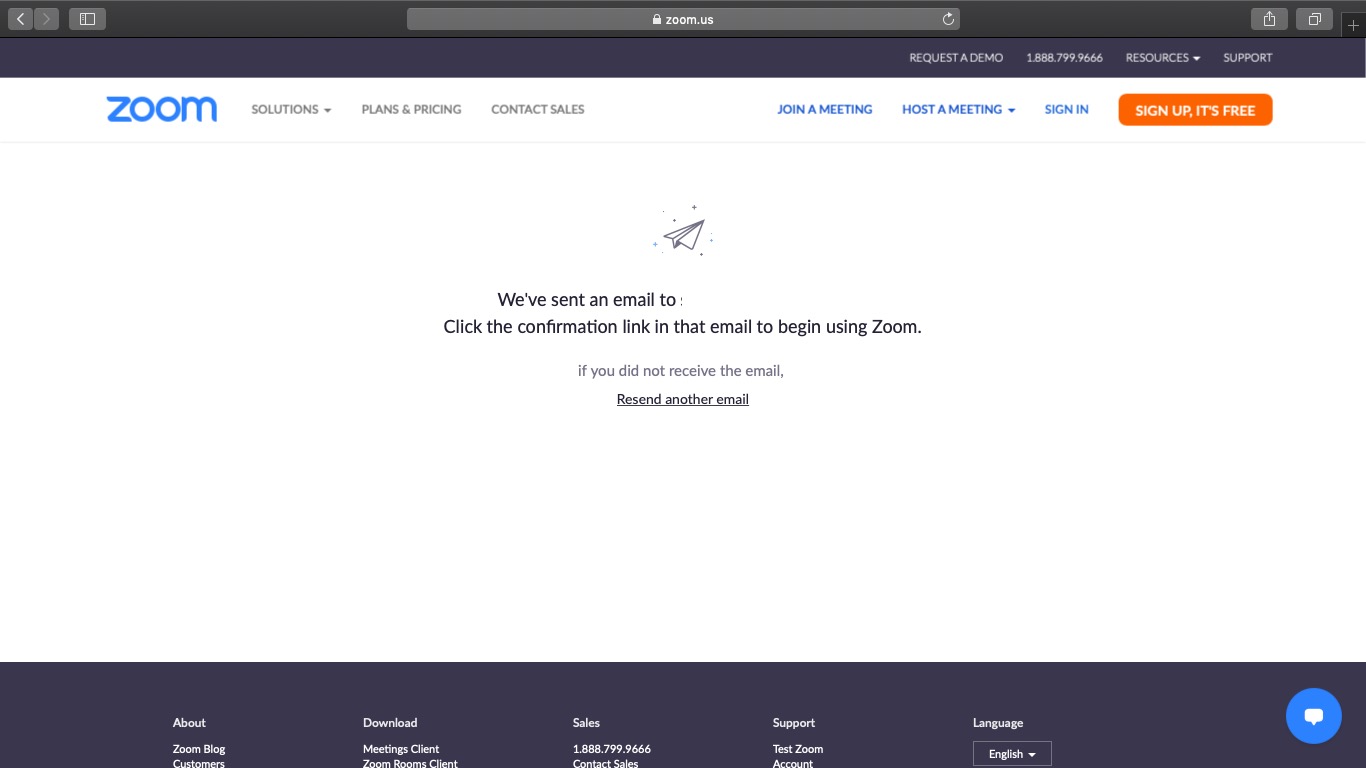
Step 3: Zoom will now send you an email with a confirmation link.
Click on that link to go to Zoom’s Sign Up Assistant and sign in using your credentials.
Step 4: Download the desktop app/ Zoom client from the Zoom website for easy access.
For Mobile:
Step 1: Download the Zoom iOS or Android app from the App Store/Play Store.
Step 2: Sign up or sign in to Zoom by following the on-screen instructions that are similar to the desktop process.
Zoom Pricing:
Zoom offers four different pricing plans to suit your specific needs:
- Basic: Free – Host up to 100 participants + unlimited one-on-one meetings + video conferencing + screen sharing + local recording + scheduling via Chrome extensions.
- Pro: $14.99/month per host – Includes all “Basic” features + usage reports + 1 GB cloud storage.
- Business: $19.99/month per host – Includes all “Pro” features + supports up to 300 participants + admin dashboard.
- Enterprise: $19.99/month per host – Includes all “Business” features + supports up to 500 participants + unlimited cloud storage.
We recommend that you start with a Pro account for your first Examination day. A Basic account is free but restricts your meetings to just 40 minutes. Your Examination day will go for several hours and you will need to have the Zoom meeting running for the entire time.
2. How To Set Up A Zoom Meeting
For Desktop:
Set up a meeting
Step 1: Log in to your Zoom account.
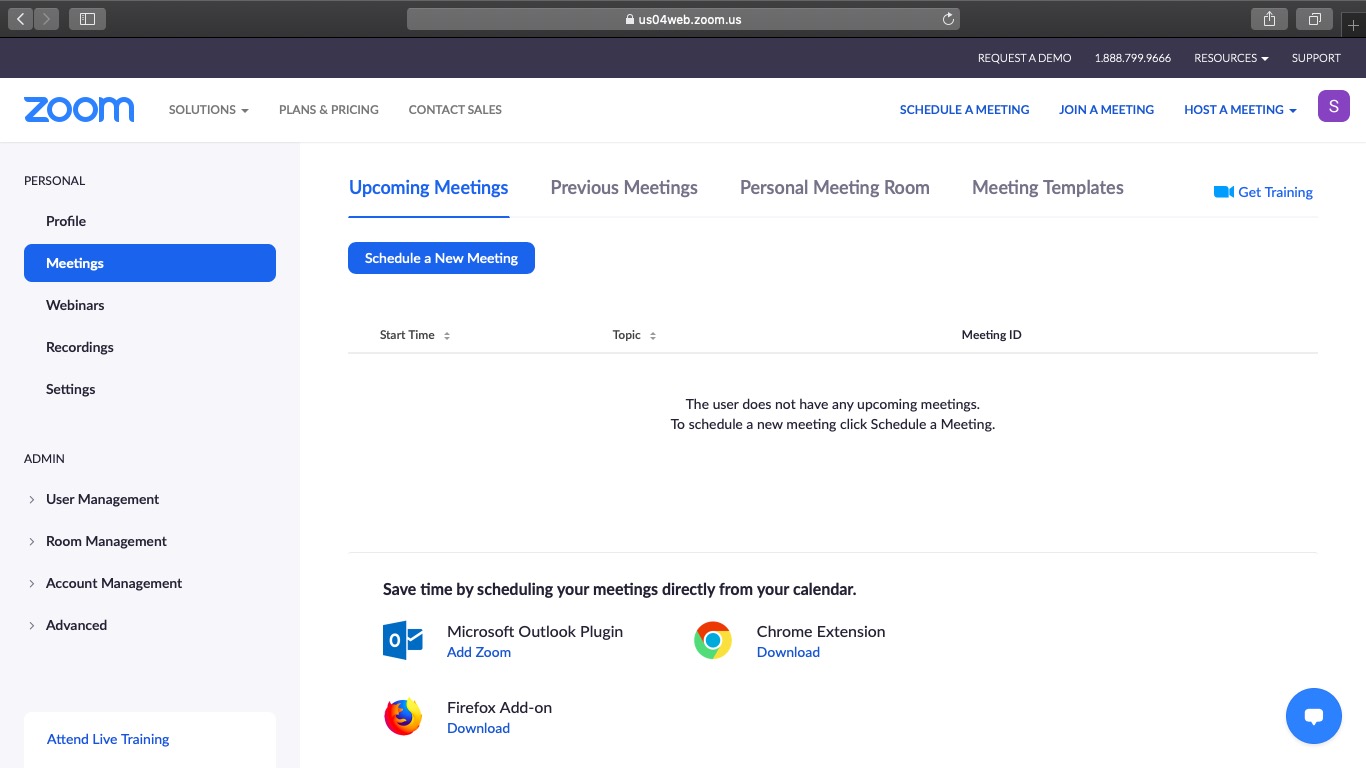
Step 2: Hover your cursor over the “HOST A MEETING” button at the top-right corner of the screen, and select one of the following options:
- With Video On
- With Video Off
- Screen Share Only
Step 3: The website will redirect you to the Zoom app and start a meeting. Here, you can edit meeting settings or copy the “Invitation URL” that you send to the attendees.
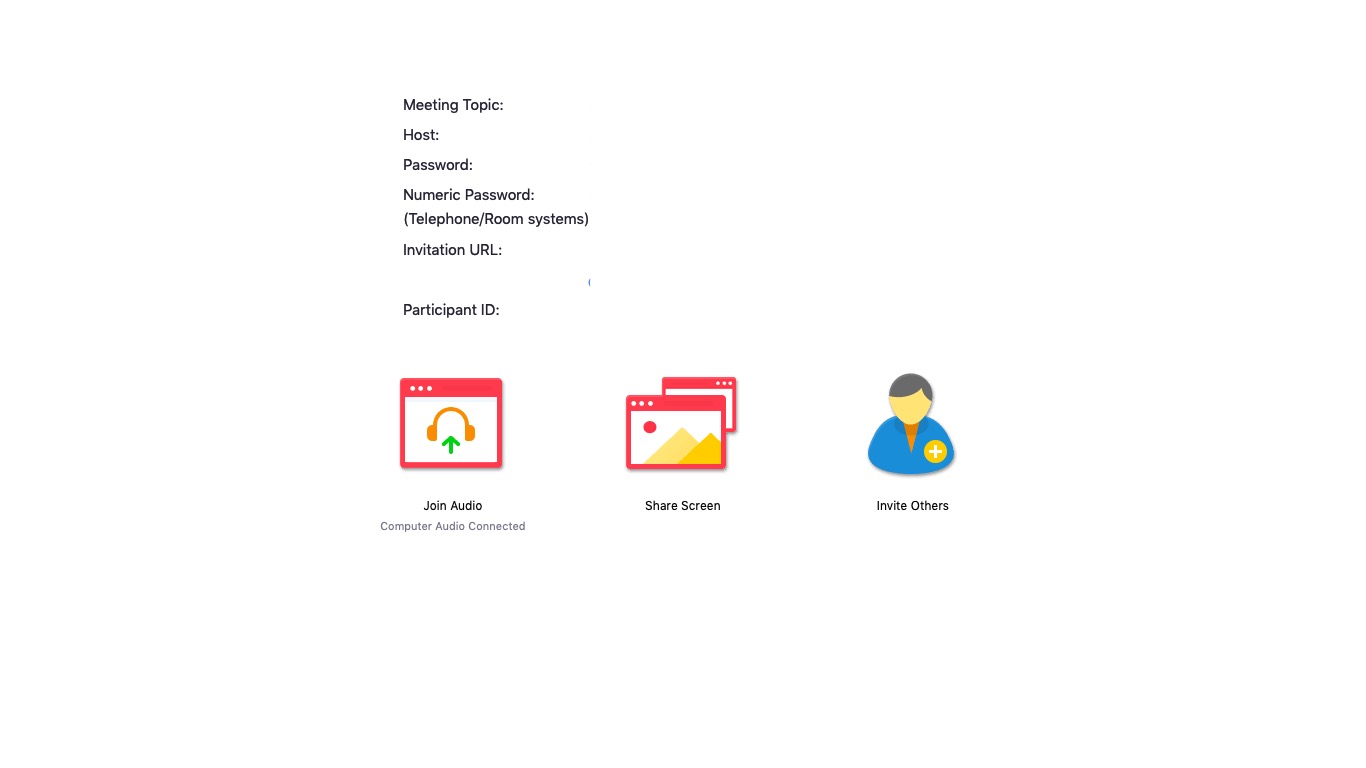
Note: You can also start a meeting quickly through the desktop app by following the instructions we listed for mobile devices later on.
Adding Participants
Step 1: Start a new meeting on the Zoom desktop app.
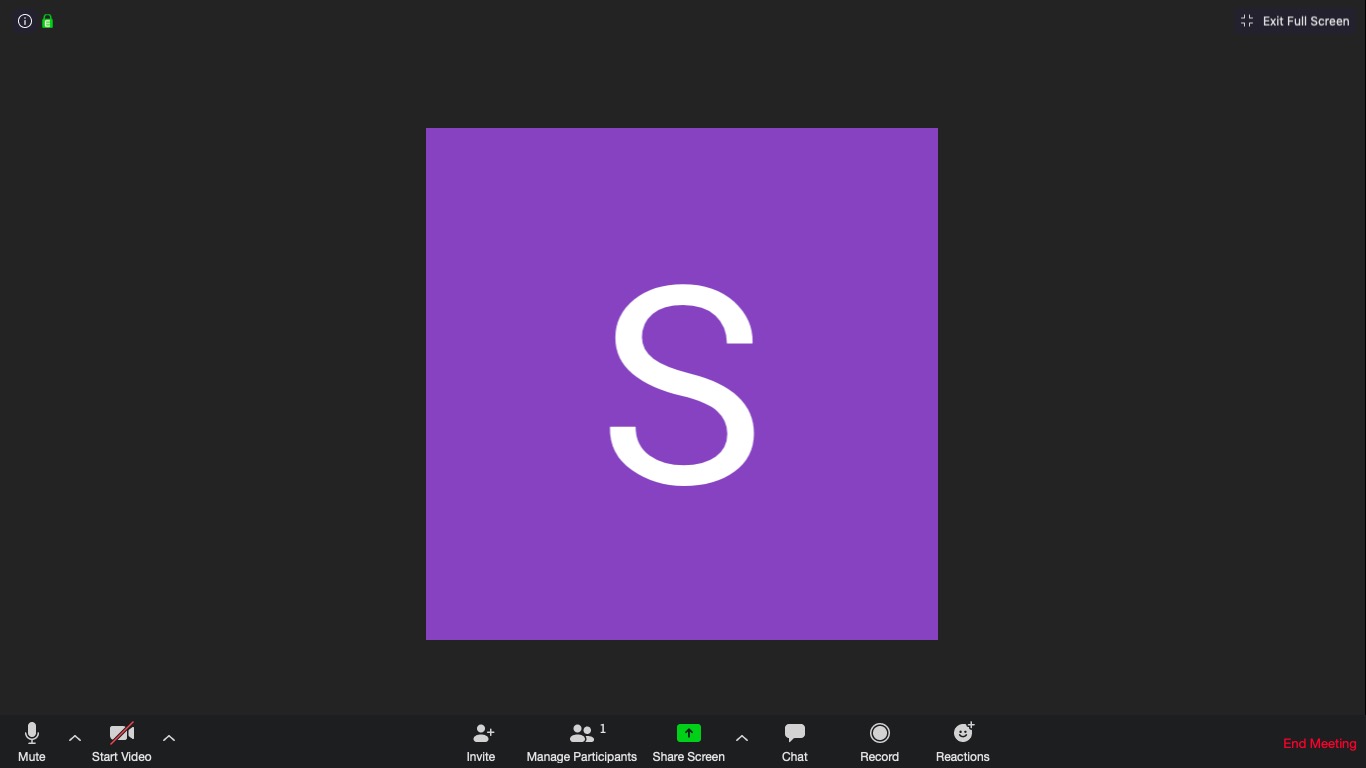
Step 2: In the new meeting screen, click on the “Invite” button in the toolbar at the bottom.
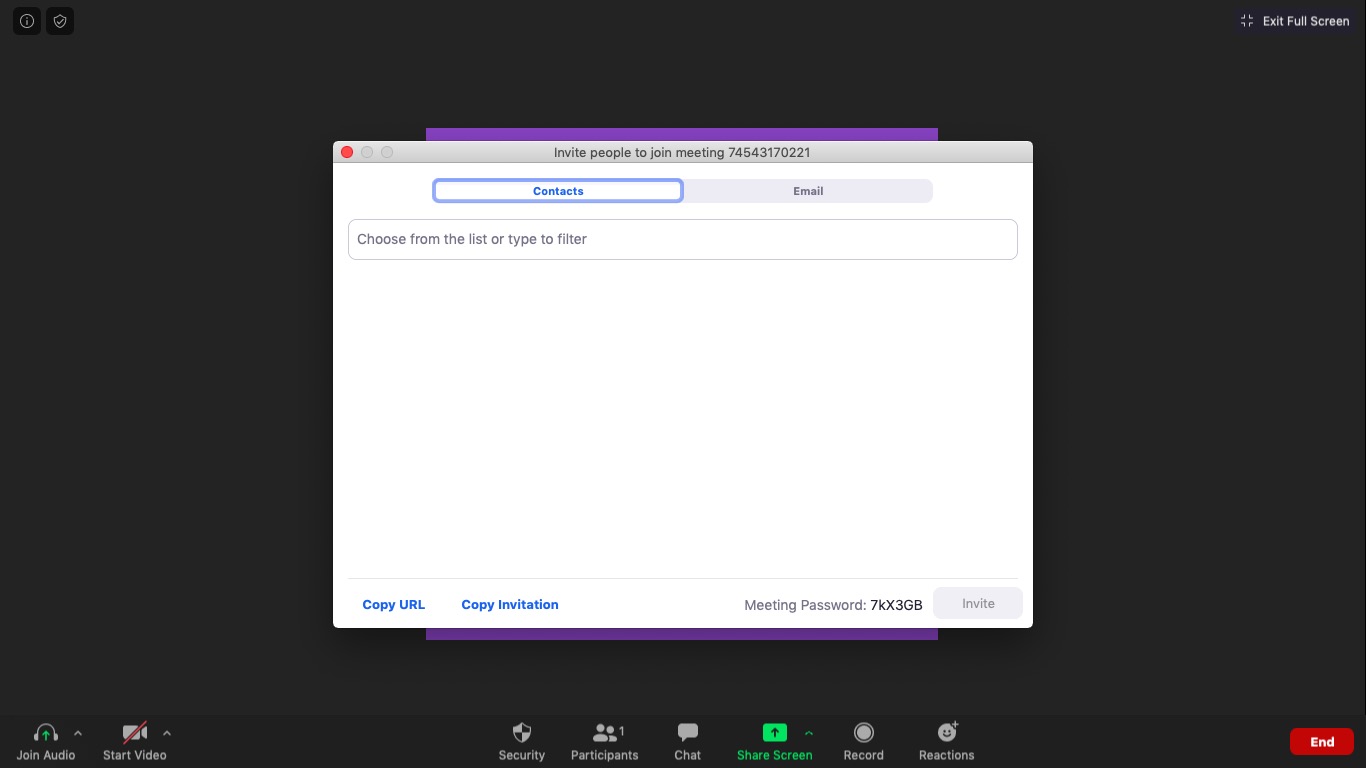
Step 3: Here, Zoom will give you the options to either Copy URL or Copy Invitation. You can send these to participants via text, email or instant messaging.
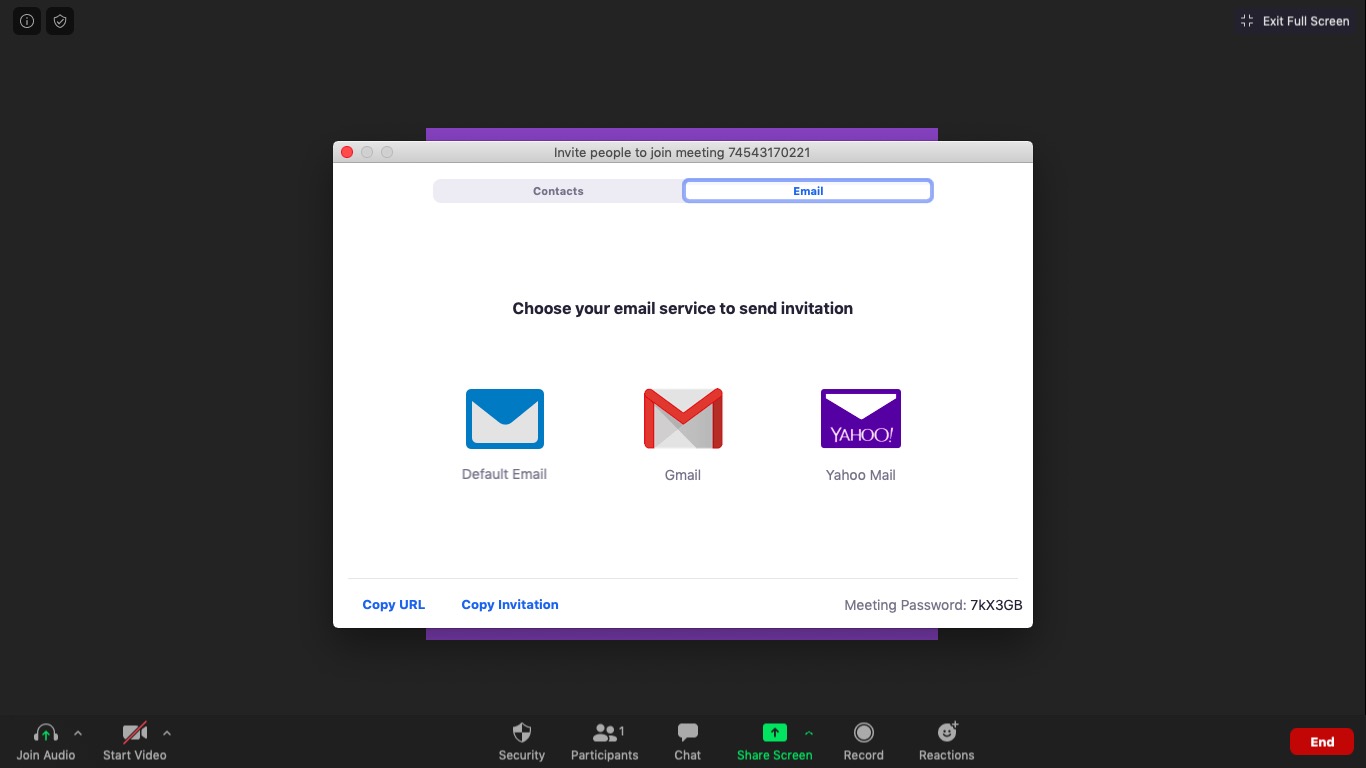
Step 4: You can also directly email the meeting details through your preferred email client via the Zoom app itself.
For Mobile:
Starting A Zoom Meeting
Step 1: Open the Zoom mobile app and sign in to your account.
Step 2: Tap the orange “New Meeting” icon that appears on your screen.
Step 3: Edit meeting settings according to your preferences (such as switching video off for participants, using a Personal Meeting ID, etc.).
Once you’re done, tap the blue “Start A Meeting” button.
Adding Participants
Step 1: Once the meeting starts, tap the “Participant” icon in the toolbar at the bottom of your screen to add and manage participants.
Step 2: In the Participants window that opens up, tap on the “Invite” option at the bottom left.
Zoom will now give you the option to share your meeting details via a variety of communication platforms. These include various text, email and messaging apps on your smartphone.
3. How To Join A Zoom Meeting
Note: The same steps apply to both your desktop and your phone.
Join Using A Meeting Link
If you have a meeting link, just click on it or paste it into your web browser to join the meeting.
Join Using A Meeting ID
Step 1: Open the Zoom app and click on the “Join” icon.
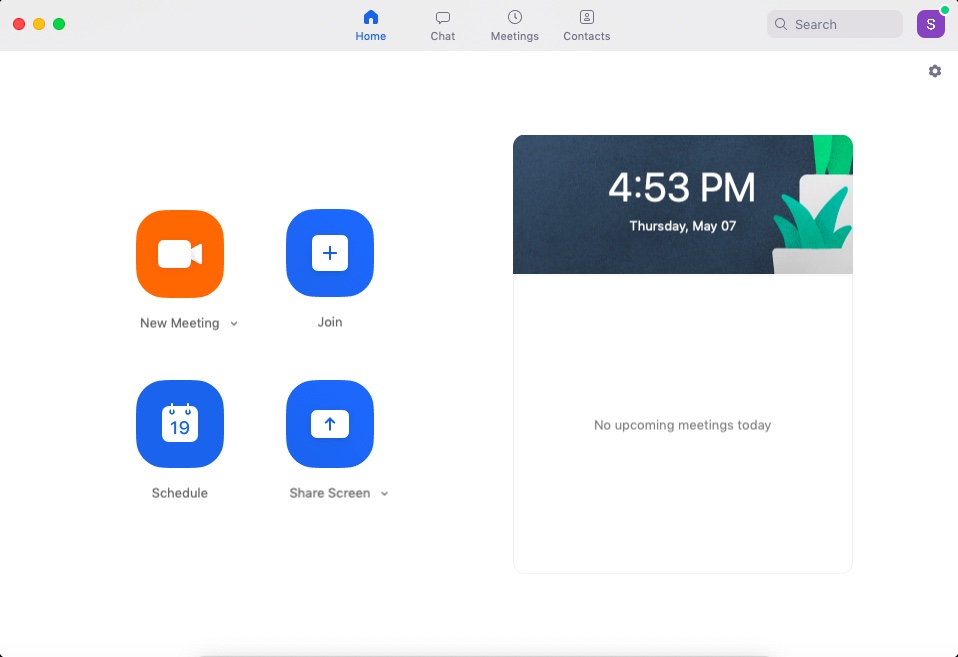
Step 2: Paste the Meeting ID in the box provided, add your display name for the meeting and click on the “Join” button.
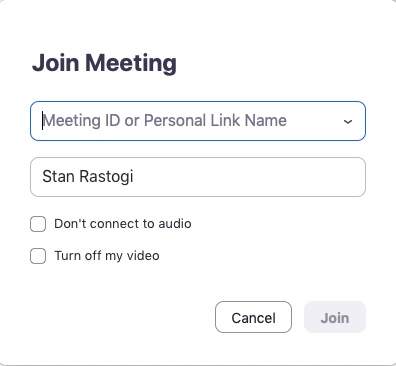
You’re now all set to do your Examination Day via ZOOM!
4. How To Schedule Meetings
You can schedule a meeting by setting:
- Its date and time
- Meeting ID
- Whether it requires a password to join or not
- And more!
For Desktop:
Step 1: To schedule a meeting, head to the Zoom app and click on the blue “Schedule” button (looks like a calendar icon).

Step 2: Enter meeting details in the Schedule Meeting pop up window that appears.
You can set its date and time, privacy and access settings. You can also select your preferred calendar (between iCal, Google Calendar or others) to schedule the event in your calendar.
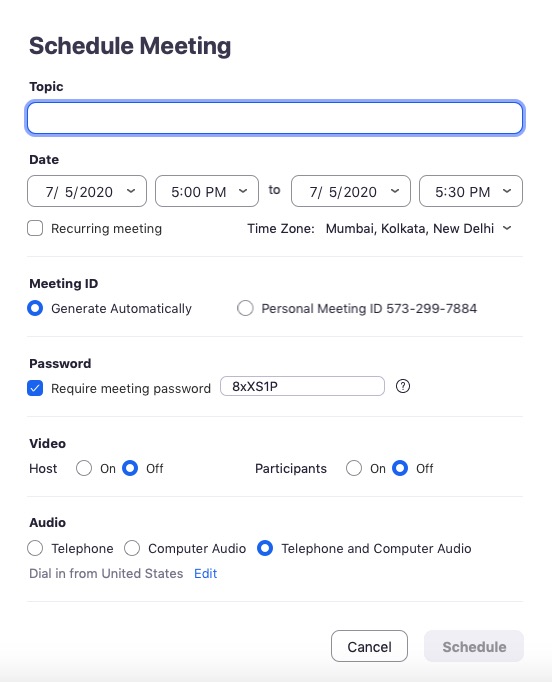
Quick Tip: Setting a meeting password can help avoid Zoombombing, which happens when someone who hasn’t been invited to the meeting joins and disrupts it.
Step 3: Once you’ve adjusted preferences, click on the “Schedule” button at the bottom right of the screen.
For Mobile:
Step 1: Open the Zoom app.
Step 2: Go to the Meet & Chat homepage and click on the “Schedule” button.
Step 3: Enter the meeting name, date and time and click “Done.”
Step 4: Zoom will redirect you or open another form for adding the event to your preferred calendar. Enter details like participant names and set the notifications into your calendar event, then tap “Done.”
You have now scheduled a Zoom meeting!
4. How To Record Zoom Meetings
Recording a meeting lets you easily use it as a reference to document everything that happened at your Examination Day.
Zoom allows you to record meetings easily and save it either to your local device or to a cloud facility. By saving it to the Zoom cloud, your team members can access it across multiple platforms easily.
Here’s how to record Zoom meetings:
For Desktop:
Step 1: Start a meeting.
Step 2: In the Zoom toolbar, click on the “Record” icon.
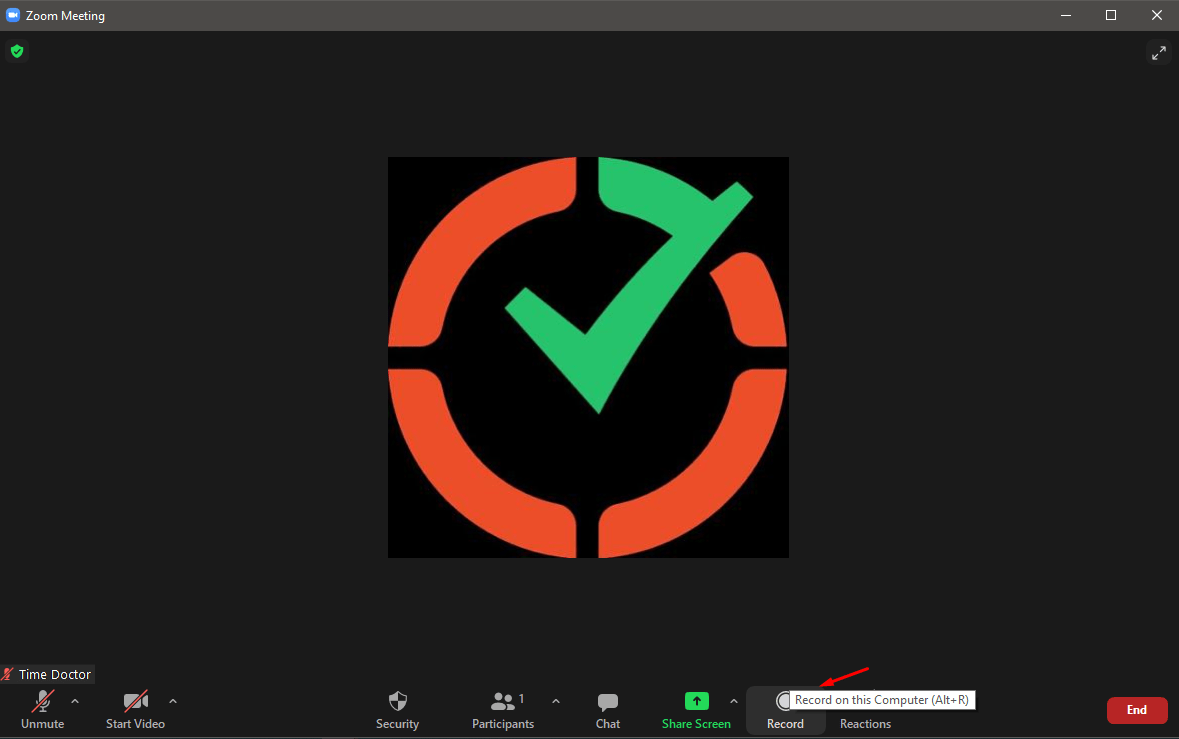
Step 3: Choose between “Record on this Computer” or “Record to the Cloud.” This starts the recording.
Step 4: Click on “Pause/Stop Recording” to stop recording the meeting. Alternatively, you can also end a meeting to stop recording it.
Step 5: After you end the meeting, Zoom converts the recording to MP4 format and stores it in your preferred location. You can now easily access your recorded sessions any time you want!
For Mobile:
On mobile devices, Zoom lets you save meeting recordings only to the Zoom Cloud. Here’s how to record a Zoom meeting from your mobile:
Step 1: During a meeting, tap on the “More” option in the toolbar.
Step 2: Select the “Record to Cloud” feature to begin recording.
Step 3: You can pause or stop the recording by clicking the “More” button.
Step 4: After the meeting, you can find your recording in “My Recordings”. You can access this section by logging into your Zoom account on a web browser.
5. Additional Features Of Zoom (and how to use them effectively)
Here are 2 features that will help you out when when conducting your Examination Day on Zoom.
Sound settings
We’ve found that, especially with Tap, that the echo from some Studio set-ups can cause a number of issues with the sound quality during Examinations. We recommend that when you start a Zoom Meeting that you change the settings of the Audio to ‘Low’ in the ‘Suppress background noise section.
Screen Sharing
Zoom lets you share your screen with other meeting participants easily.
This lets you:
- Host virtual presentations and workshops.
- Explain processes in detail.
- Review work and project documents together with your team.
To share your screen, just click on the “Share Screen” icon in the toolbar.
This lets you share:
- A specific app or window.
- A whiteboard.
- Apple iPhone / iPad screen (if your device supports this).
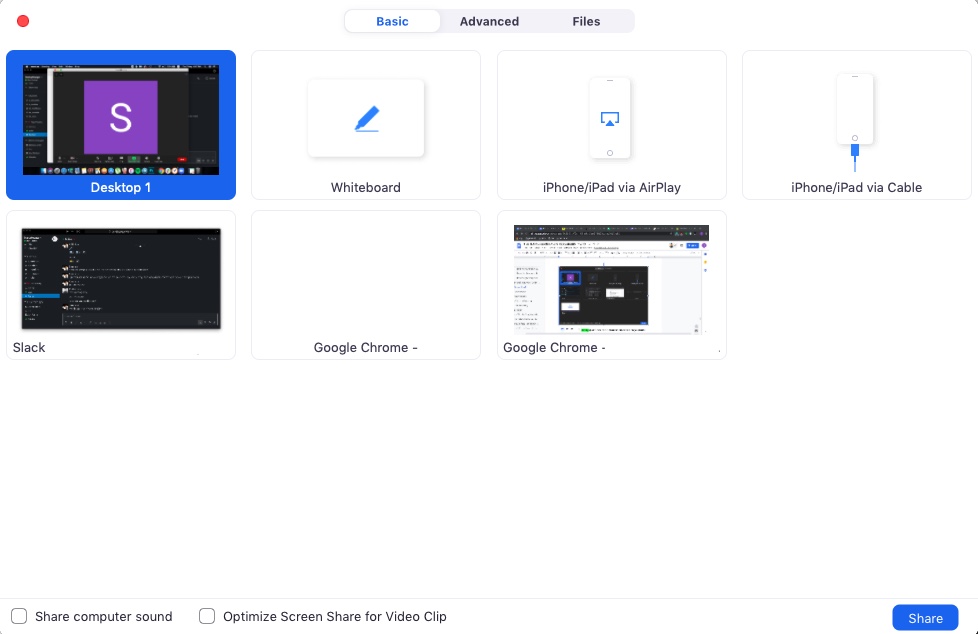
If you want more screen sharing options, click on the “Advanced” tab at the top of your screen.
Here, you can choose to share:
- A part of your screen or the entire screen.
- Only your computer’s sound or your microphone’s sound as well.
- Content from a second camera or content only from your screen.
Other Tips For Effective Zoom Video Conferencing
To make your experience more comfortable, here are three tips that can help studios conduct seamless Zoom meetings and calls:
Tip #1: Always Mute Your Microphone Unless Speaking
Make sure to mute your microphone when you’re not speaking.
This eliminates any background noise or interference in the audio.
To mute your microphone, use the microphone button at the bottom left of the Zoom toolbar that appears in the meeting screen.
Alternatively, you can set your Zoom meeting preferences to mute your microphone at the start of every meeting automatically.
To unmute yourself, use the microphone button or hold your spacebar for as long as you’re speaking. This basic rule allows group meetings or conversations to run smoothly!
For more efficient background noise elimination, use noise cancellation tools like Krisp to elevate your audio quality to the next level.
Tip #2: Inform Participants Before Recording The Meeting
Before you record any audio or video conference, make sure that all meeting participants:
- Are aware that they are being recorded.
- Have permitted you to record them.
You could even take this permission in writing or record it at the start of the meeting.
Why? Not only does this maintain common courtesy, but it may be required by consent laws and regulations in many companies and regions.
Tip #3: Ensure Everything Is Working Correctly Before Starting A Meeting
It’s extremely common for video conferences to be delayed or get interrupted due to technical snags.
To ensure that this doesn’t happen, turn on your device and check if Zoom’s working correctly at least 10-15 minutes before every meeting. And if something’s going wrong, alert your meeting host at the earliest (if you’re the host – inform your participants of the same).
While conducting a check before every meeting may feel tiring, it’s far better than being embarrassed or annoyed when something goes wrong during your Zoom meeting!
Our recent Zoom Q and A session


